Git wise!

The Basics

Overview

  1. What is version control?
  2. Setting up Git
  3. First steps with Git
  4. Good practices
  5. Extras

What is version control?

  • What: It keeps track of the changes made to a file when you edit it.
  • When: It records the date and time when each change was made.
  • Who: It keeps a record of who made each change.
  • Why: It allows you to add a note explaining why you made a particular change.

Introducing Git

  • Most widely used version control system.
  • Originally for Linux; now used on all major operating system
  • Official Git documentation: https://git-scm.com/

The Version Control Book

Git for Windows

  • Offers full feature set of Git to Windows through either:
    • Git BASH: A BASH emulation (like in a *NIX environment)
    • Git GUI: for Windows users who prefer a graphical user interface
  • Originally for Linux; now used on all major operating system
  • Downloadable from: https://gitforwindows.org/

Setting up Git

Why use the Command Line Interface?

  • Power: it is a robust and powerful tool, enabling users to accomplish intricate tasks efficiently.
  • Simplicity: a few strokes or line of code allow execution of complex commands
  • Task automation: allows you to automate repetitive tasks
  • Flexibility: if you know how to use it in the CLI, you can use it in any derived tool
  • Workflow integration: can be integrated into larger workflows
  • Comprehensive feature set: only the CLI allows the full gamut of commands
  • Extensive online support: most help in the large online community will focus on CLI commands

Finding Git on your machine

  • Linux/MacOS: good to go :D
  • Git for Windows
    • During installation I recommend Git Bash:
      • It emulates Linux, OS of choice in academic and scientific research
    • During installation you can select what text editor you’d like to use:
      • Nano –> easy to use
      • Vi(m) –> more powerful, but steep learning curve
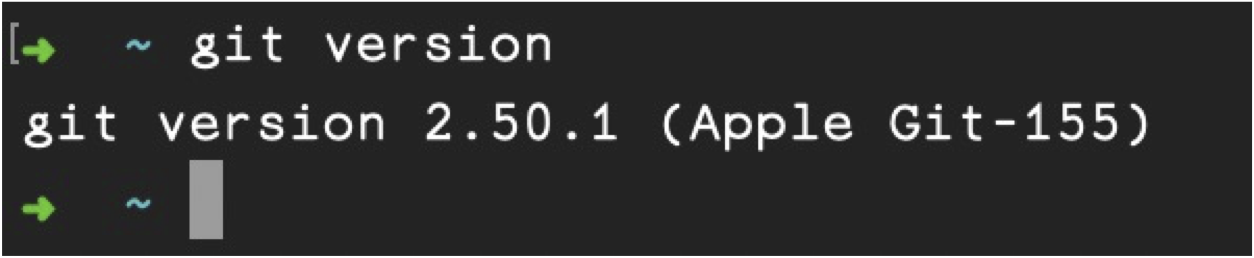
    • Open terminal window: type git version to see whether it is installed

Setting up Git: configuration levels

  • git config --help
  • git config --global core.editor “nano”
    • default on MacOS and Linux is “vi”
  • System: applies configuration to every user on the system and all their repos. Requires admin rights.
  • Global: applies configuration to all repos owned by the user
  • Local: applies configuration to current repo only
    • Note that overrides work as follows: local > global > system

Setting up Git: identifying yourself

  • Allows others (and future self) to see who made which changes and how to contact you.
  • Allows you to connect Git to remote repositories
    • Use email address that is also used to create an account on Codeberg, GitLab, Github etc.

  • git config --global user.name "Jane Doe"
  • git config --global user.email jane@example.com

  • git config --list
    • check your configuration at current level

Getting help

  • git help <any command>
    • Shows help information for Git
      • e.g. git help config will give documentation on git config

OR

  • git config --help for the same output
    • --help can be used with (almost) any command, even git help --help
  • Or search your question with your favourite search engine, e.g. DuckDuckGo
    • Stack Overflow will very often have an answer!

By Jan Misset, uploader: Alf van Beem – Own work (public domain)

First steps with Git

Creating a Git repository

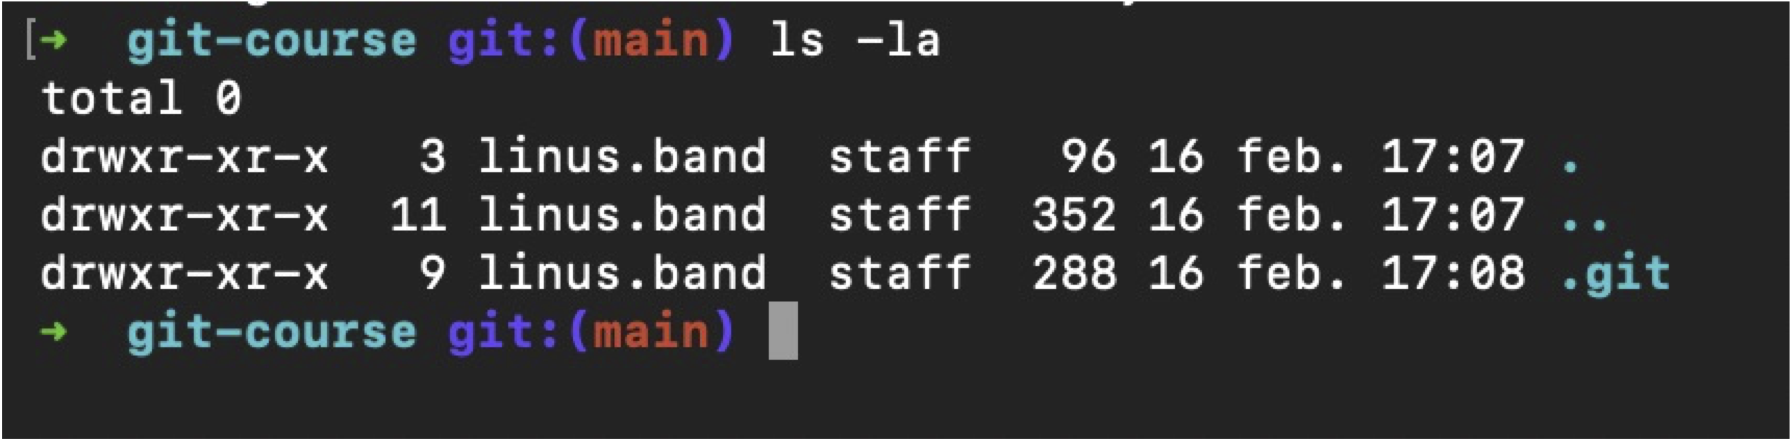
  • git init <optional path>
    • Git will now track all changes in present folder and subfolders
    • You can add an optional path after git init to create the repo in another location
    • Note: Do not create a git repo in your home directory!
      • Consider creating an empty .git folder in your home directory to avoid this
Exercise 1: setting up Git

  1. Create a gitting-started folder
  2. Create a Git repo in it

Checking your repo’s status

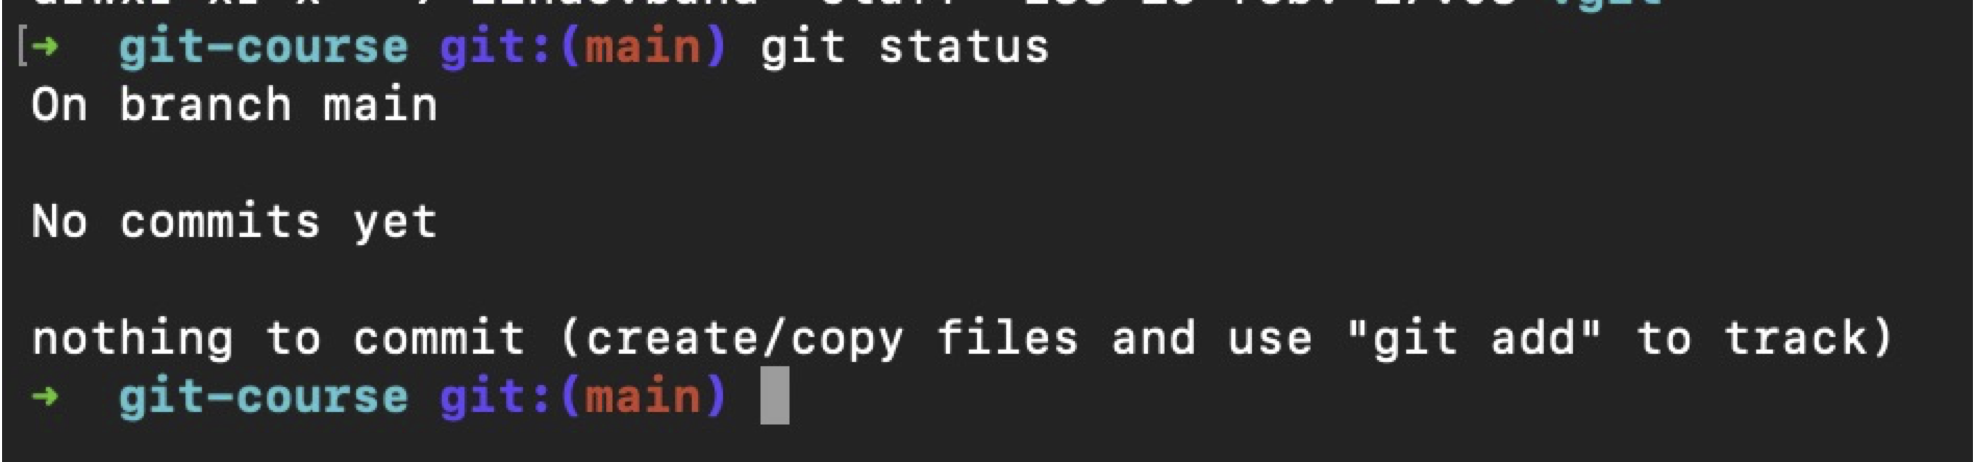
  • git status
    • Very useful and often-used command!

Adding files to the repo – 1

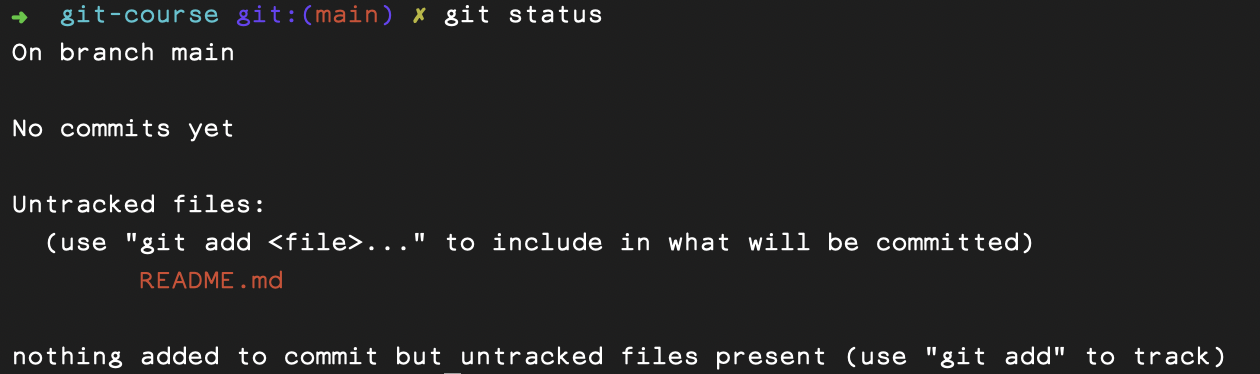
  • nano README.md
  • Write something in there
  • Save and close
  • git status

  • The first file in a new repo will often be your README.md
  • The .md extension indicates the simple and easy-to-use MarkDown language
  • The README should (ultimately) contain:
    1. Context of the software (why was it written?)
    2. Purpose of the software (what should it do?)
    3. Usage of the software (how do you run/use it?)

Adding files to the repo – 2
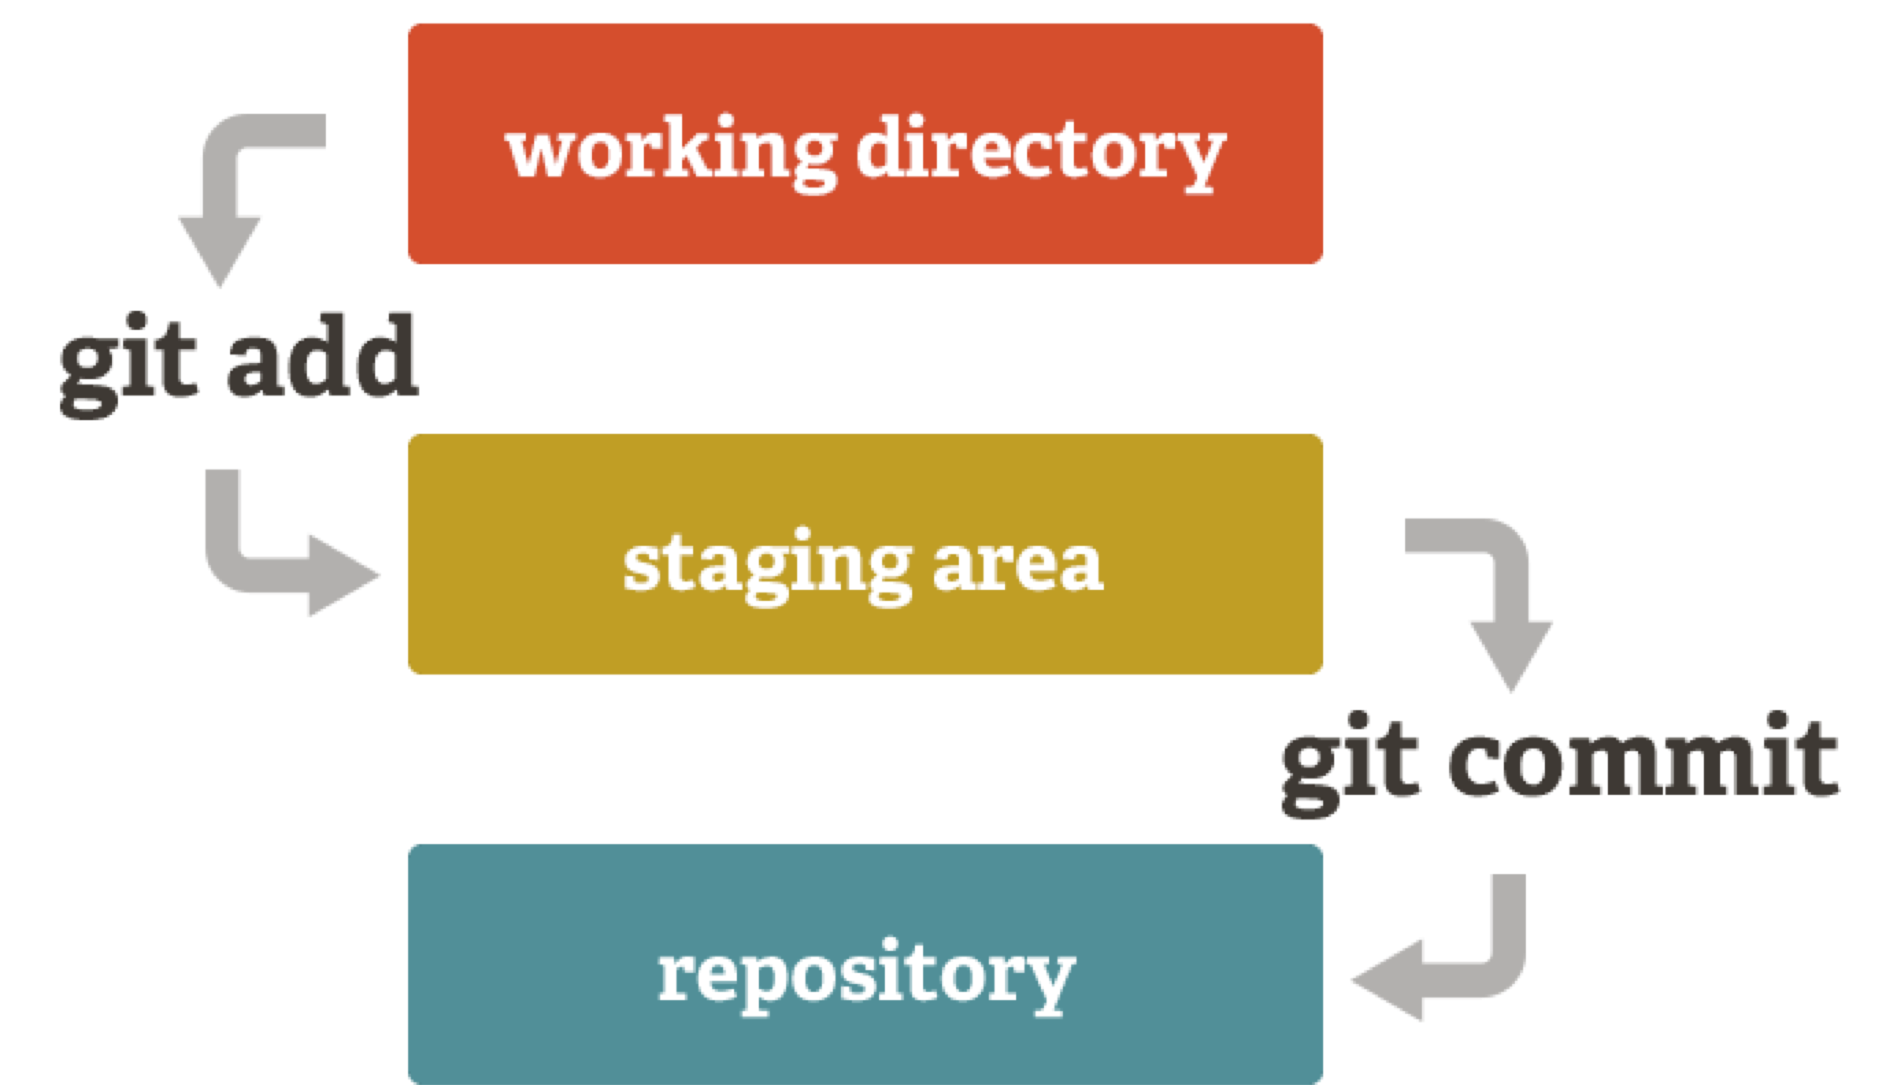
Working directory: where untracked changes live

Staging area: where you prepare your snapshots

Repository: tracks the history of changes in your project

Adding files to the repo – 3

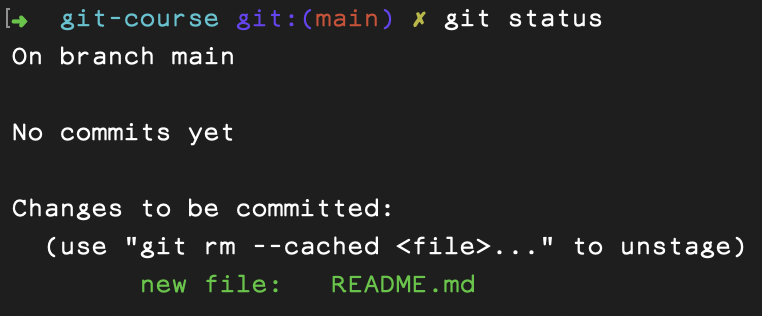
  • git add <filename>
  • git add -A
    • Adds all changes from tracked and untracked files
  • git add .
    • Adds all changes in current folder and subfolders
  • To unstage a change:
    • git rm --cached <file name>
    • OR: git restore --staged <file name>
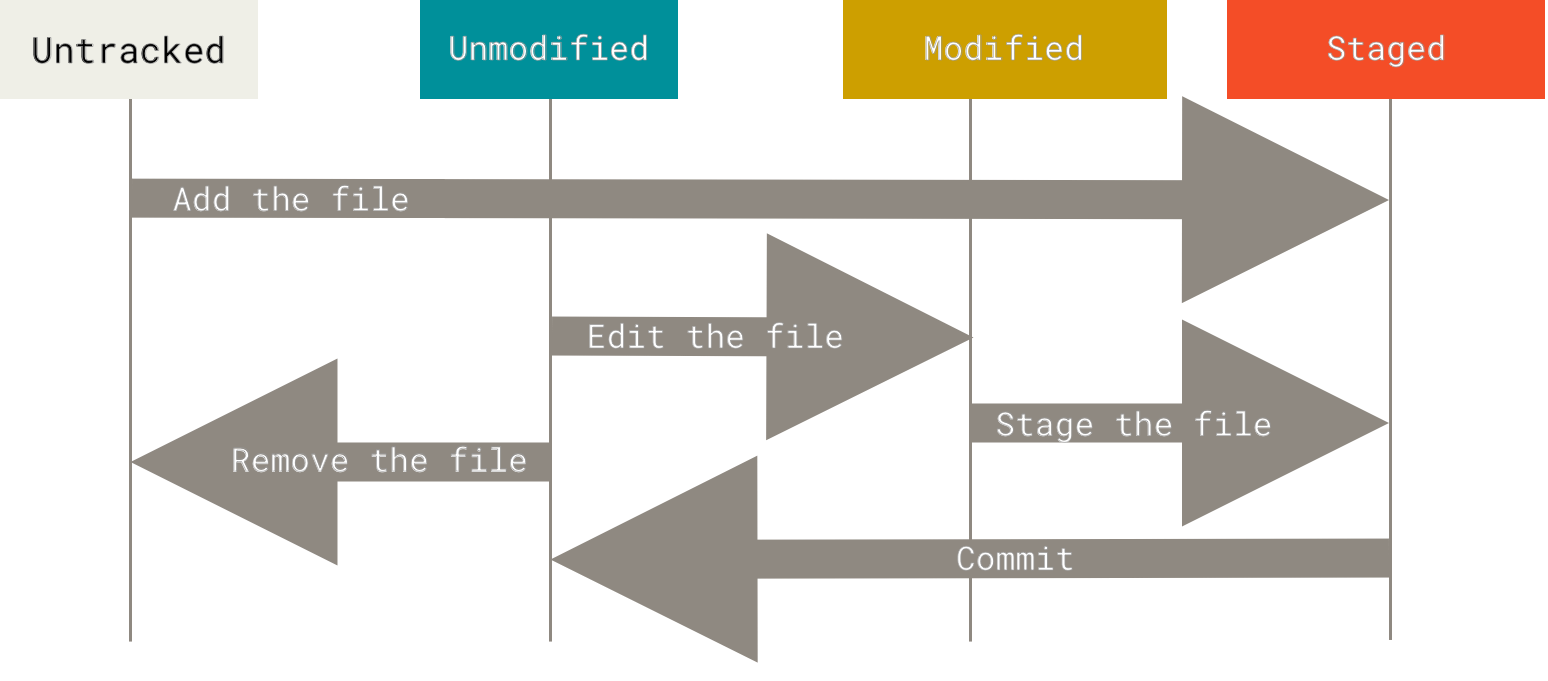
  • Tracked files: staged files or files git knows about from previous commits
  • Untracked files: anything else

The Git lifecycle
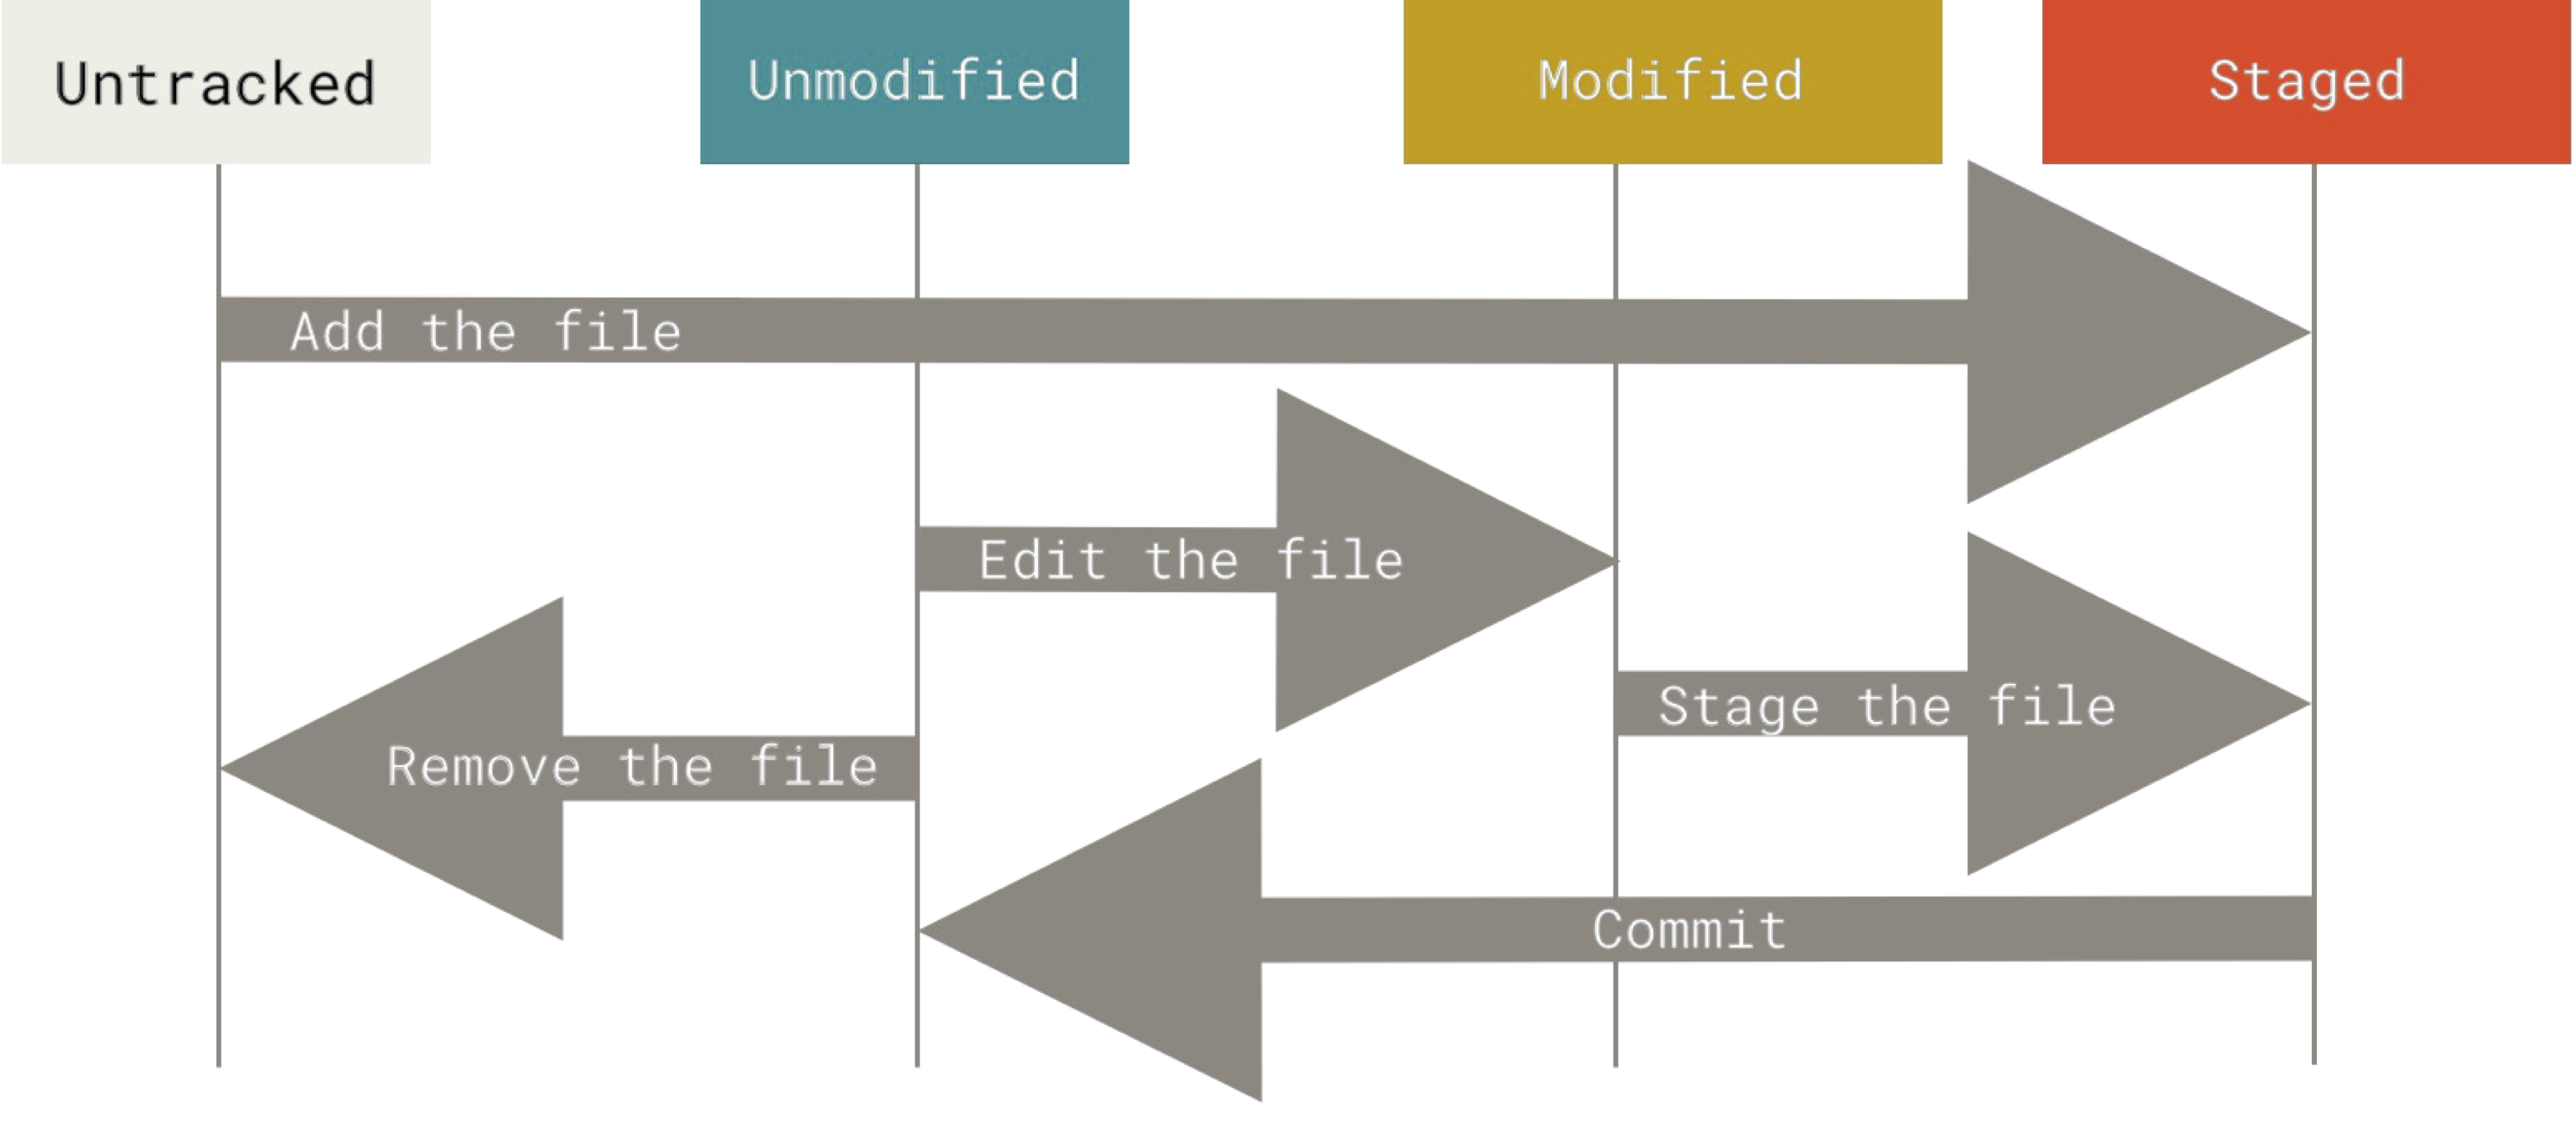
Source: https://git-scm.com/book/en/v2/images/lifecycle.png

Exercise 2: adding files

  1. Make sure you are in gitting_started
  2. Create a file called test.txt
  3. Stage everything with git add . or git add -A
  4. Notice that you also added the test.txt from earlier
  5. Unstage test.txt
  6. Check that only the README.md is staged.

Adding files to the repo – final remarks

NOTE

Git is not a file storage system: do not use it for storing/tracking large files!

Why?

  1. Git always looks at the whole repo, so it scales badly
  2. Everyone using the repo has a whole copy on their system
  3. Tracking the history of a large repo is very difficult

How to commit?

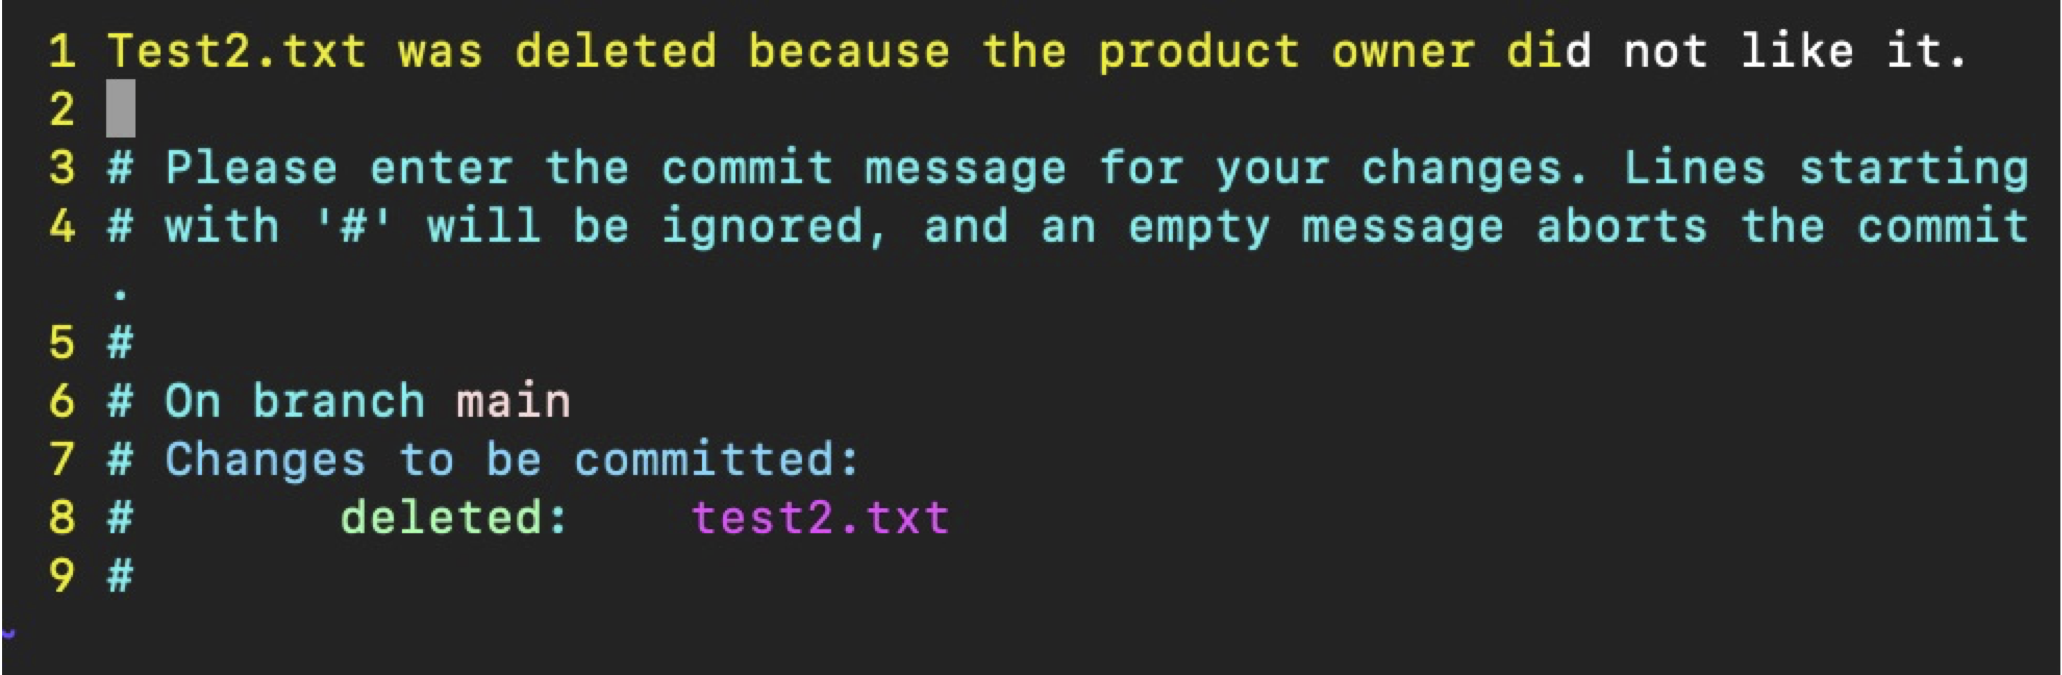
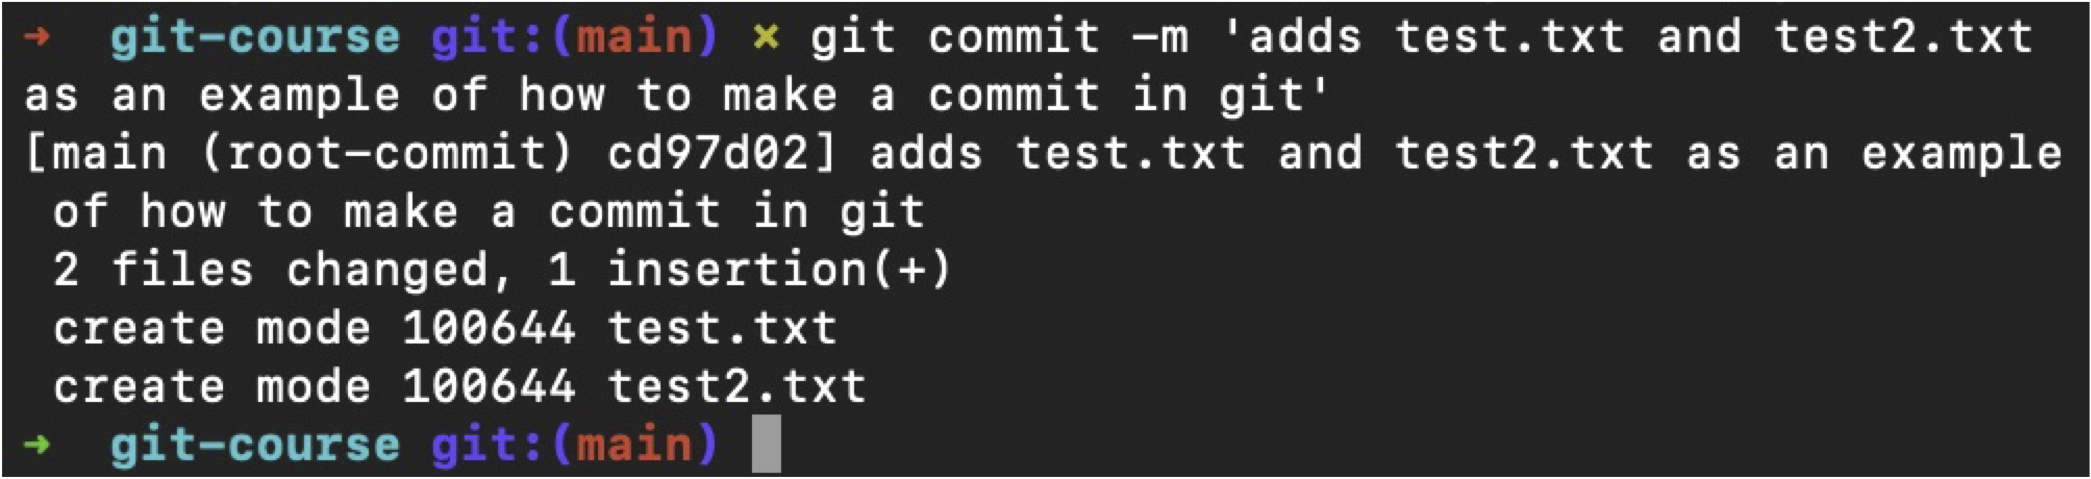
  • git commit
    • Opens default terminal editor to create commit message.
    • Write message and close and save to finish commit.
  • git commit –m “a message briefly saying what you changed and why”
    • Uses the message supplied with -m option instead

Exercise 3: commitment

  1. Commit your changes with a meaningful commit message
  2. Rejoice, for this was your first commit ever!

AAAARGH, I regret my commit! – 1

  • You deleted something you shouldn’t have
  • You forgot to add something to previous commit
  • Etc.
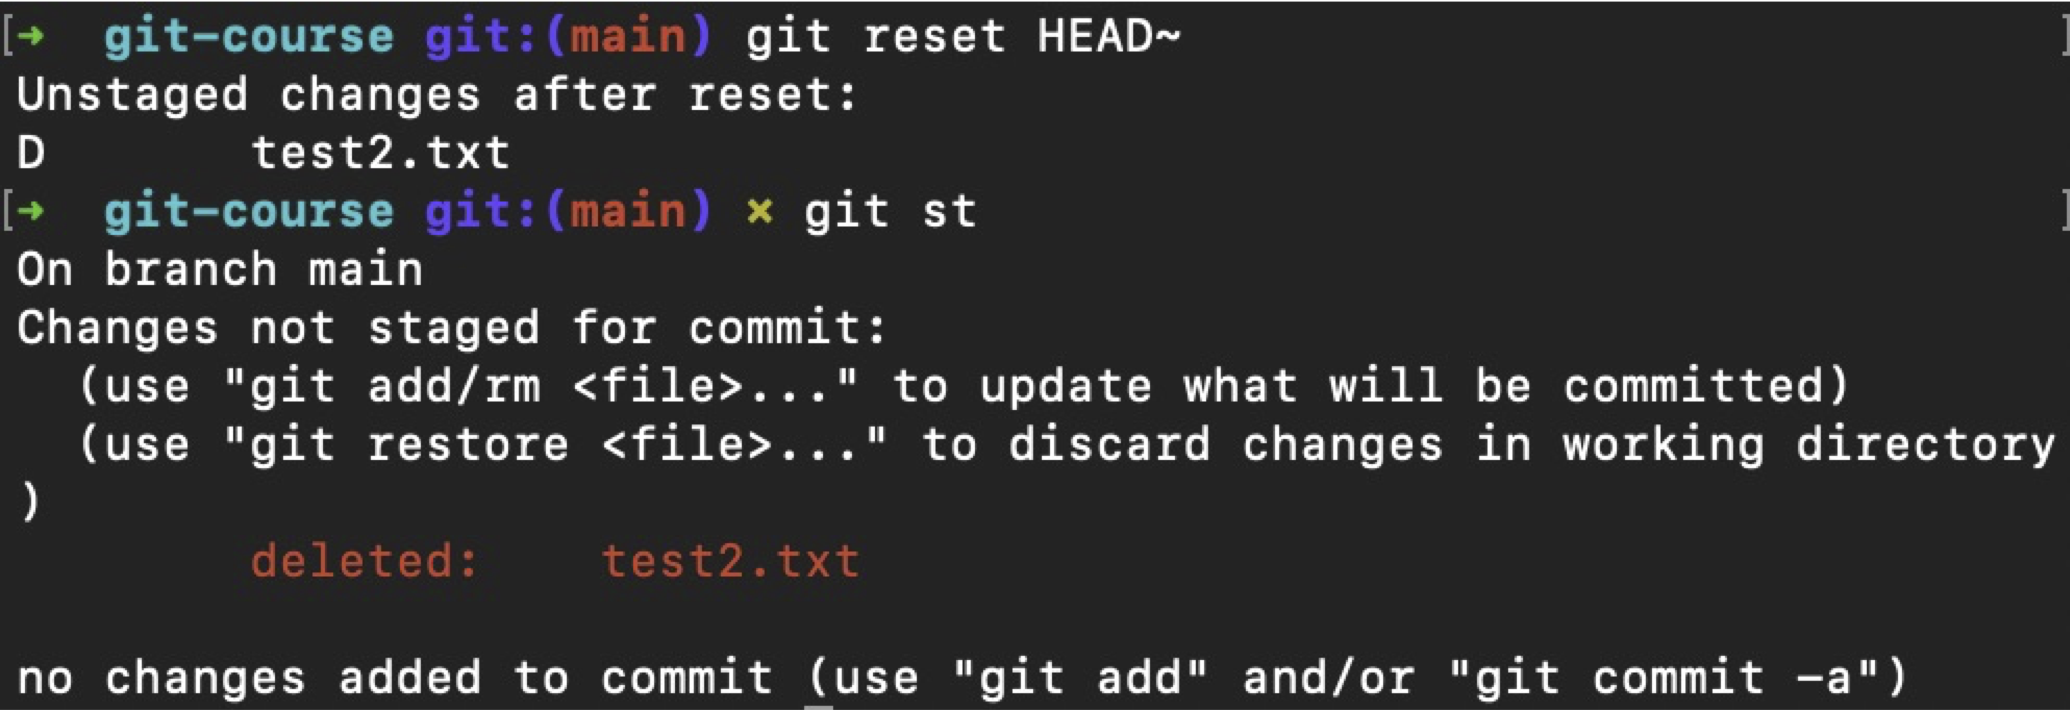
  • git reset HEAD~
    • Undoes previous commit and resets to untracked
    • Note: does not work after first commit of new repo!
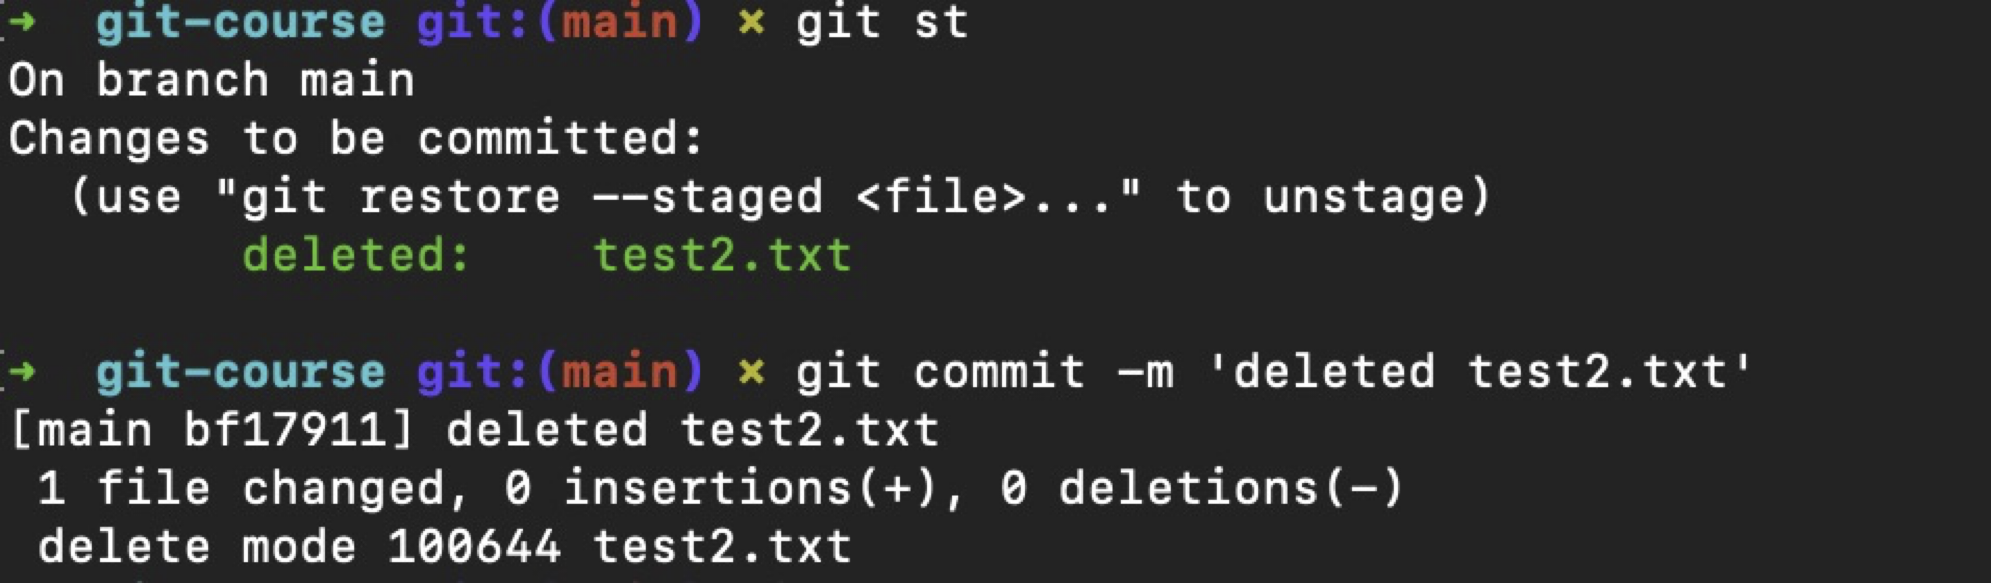
AAAARGH, I regret my commit! – 2

  • You can also amend the previous commit:
    • git commit --amend -m "changed commit message”
      • Or: git commit --amend --no-edit
        • This keeps the commit message of the previous commit.
      • You can use --amend gradually build up a larger coherent commit.

Tip for the future

AVOID amending a commit that is already pushed to remote!

Good practices

Good commits: what are they?

  • Committing often makes it easier to:
    • Track changes
    • Identify bugs
    • Revert to earlier version

It is not a save button!

  • Each change should be meaningful: ideally isolated and complete
  • See previous slide on --amend

Good commits: good messages

  • Commit message is (72 char limit)
  • Description also possible (no limit)
    • git commit -m "Message" -m "Description"
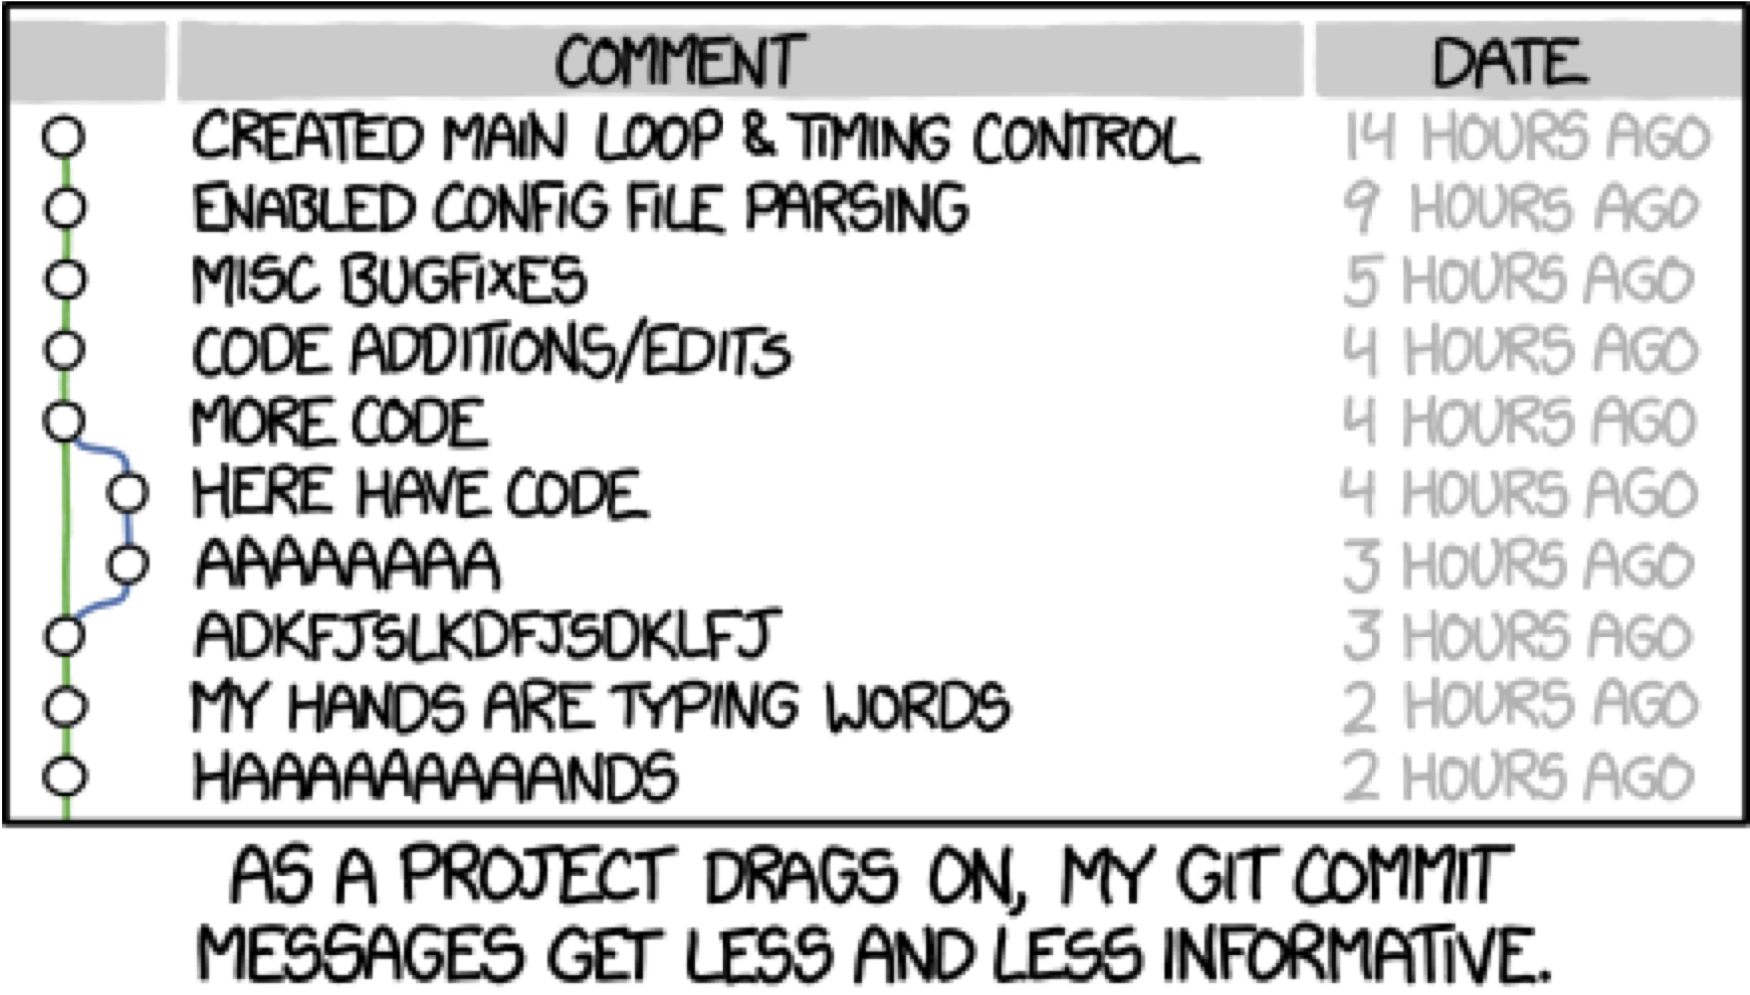
  • Write clear and short commit messages
    • What and Why
    • Reference issue numbers (if present)
    • Think of others and future self!

Exercise 4: good commits

  1. Create a file in which you write something about a hobby/interest of yours
  2. Create another file with a line about your favourite food or place.
  3. Oops! You actually wanted to outline the contents of this repo in your README:
    1. Add a heading for Contents in your README and list the files (using Markdown if you want)
    2. Add the changes to ONLY the README to your previous commit
  4. Make a separate commit for your new files.

Commit history

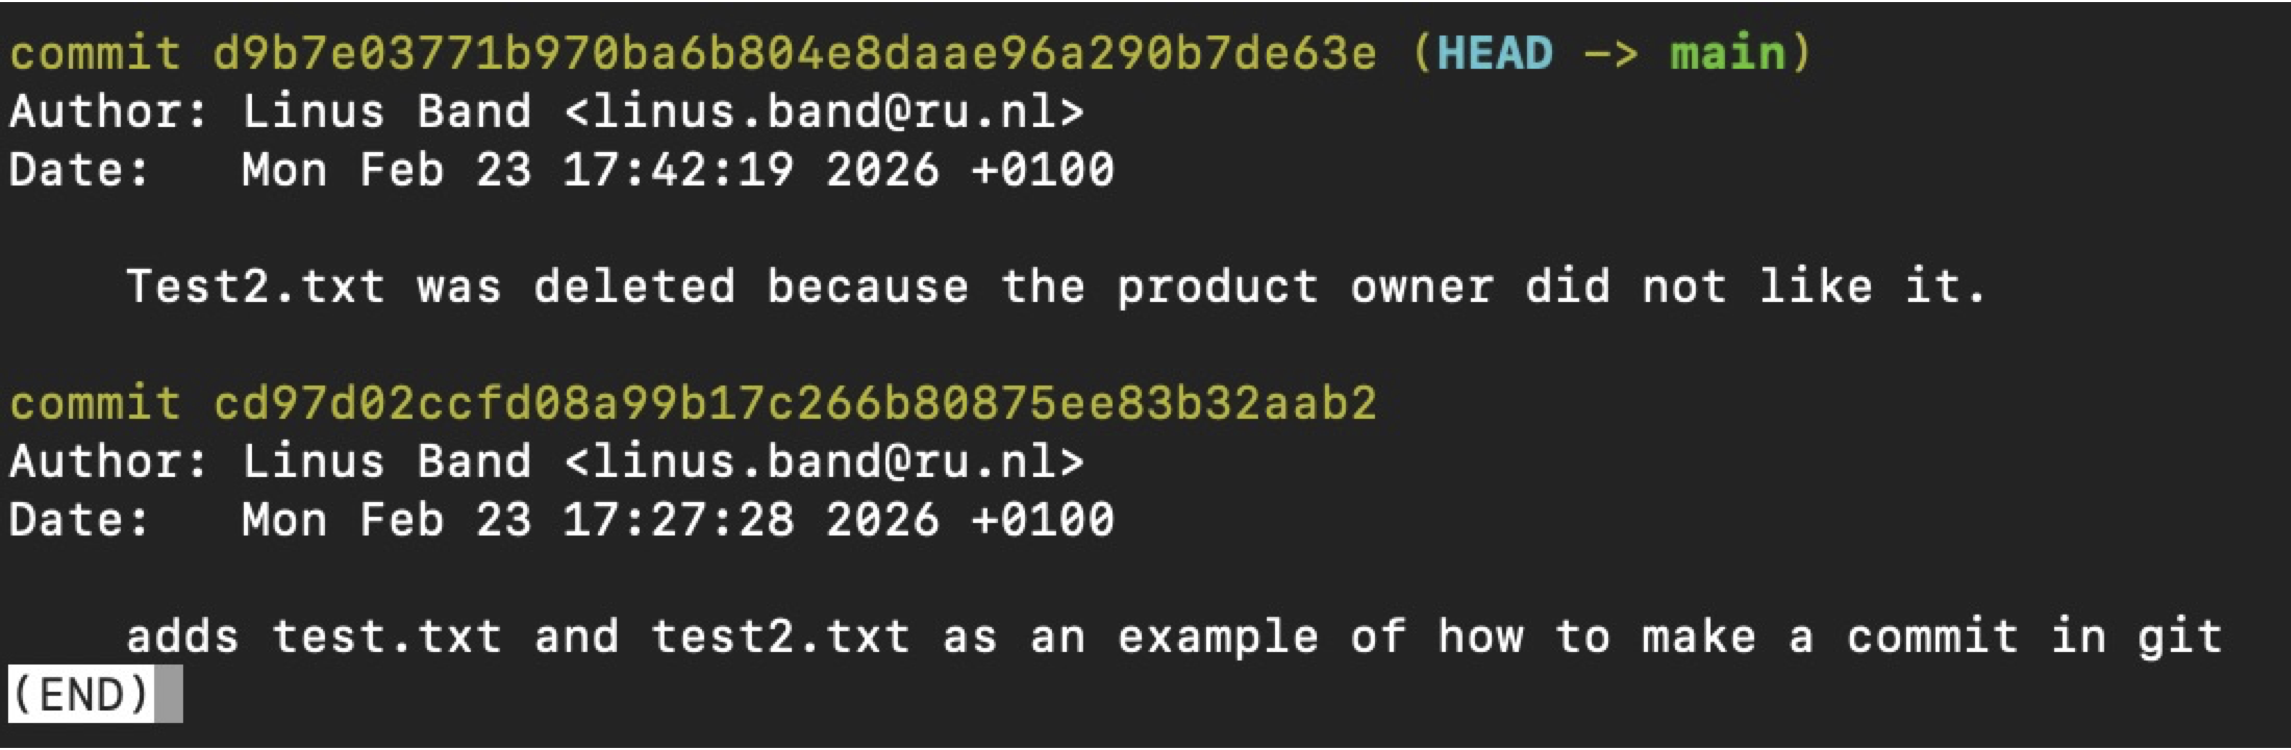
  • git log
    • Unique identifier
    • Author
    • Date and time of change
    • The original commit message

Excluding things: .gitignore

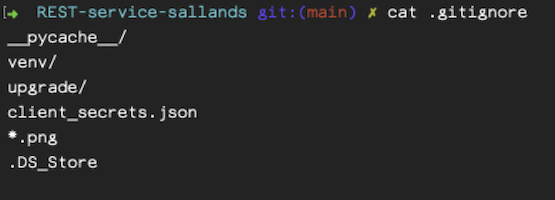
  • .gitignore is a hidden text file
  • Specifies which files and folders should be ignored by Git
    • Helps avoid commiting sensitive information to the repo
    • Including only essential files in version control keeps your repo clean
  • Create this file in your repo
  • Each line contains an ‘ignore’
  • Don’t forget to commit your .gitignore!
  • Example of .gitignore file for R code

.gitignore wildcards

  • * Matches any number of characters within a filename.
    • For example, *.txt will match all files with the extension .txt in any directory.
  • ? Matches a single character within a filename.
    • For example, image?.png will match files like image1.png or pictureA.png.
  • / Matches the root directory of the repository.
    • For example, /config will match a directory named config only in the root of the repository.
  • [] Matches any single character within the brackets.
    • For example, file[123].txt will match file1.txt, file2.txt, or file3.txt.
  • ! Negates a pattern and includes files that would otherwise be ignored.
    • For example, !important.txt will exclude important.txt from being ignored, even if there’s a wildcard pattern that matches it.

Keeping stuff: .gitkeep

  • By default, Git ignores empty folders
  • To keep them, add a .gitkeep file to the folder
    • Not an official Git feature, but a convention
  • Use case example: you may want to track a folder for script input or output
  • Another use case example

Exercise 5: should it stay or go now?

  1. Create a data folder in your repo
  2. Look up cute pictures of your favourite animal and download these
  3. Move them to your data folder
  4. Check the extensions
  5. Create a .gitignore file that ignores any files ending in the extensions from step 4 (tip: use * wildcard!)
  6. Make sure that the data folder is tracked, even when technically empty
  7. Add and commit your changes meaningfully

Partial commits (interactive)

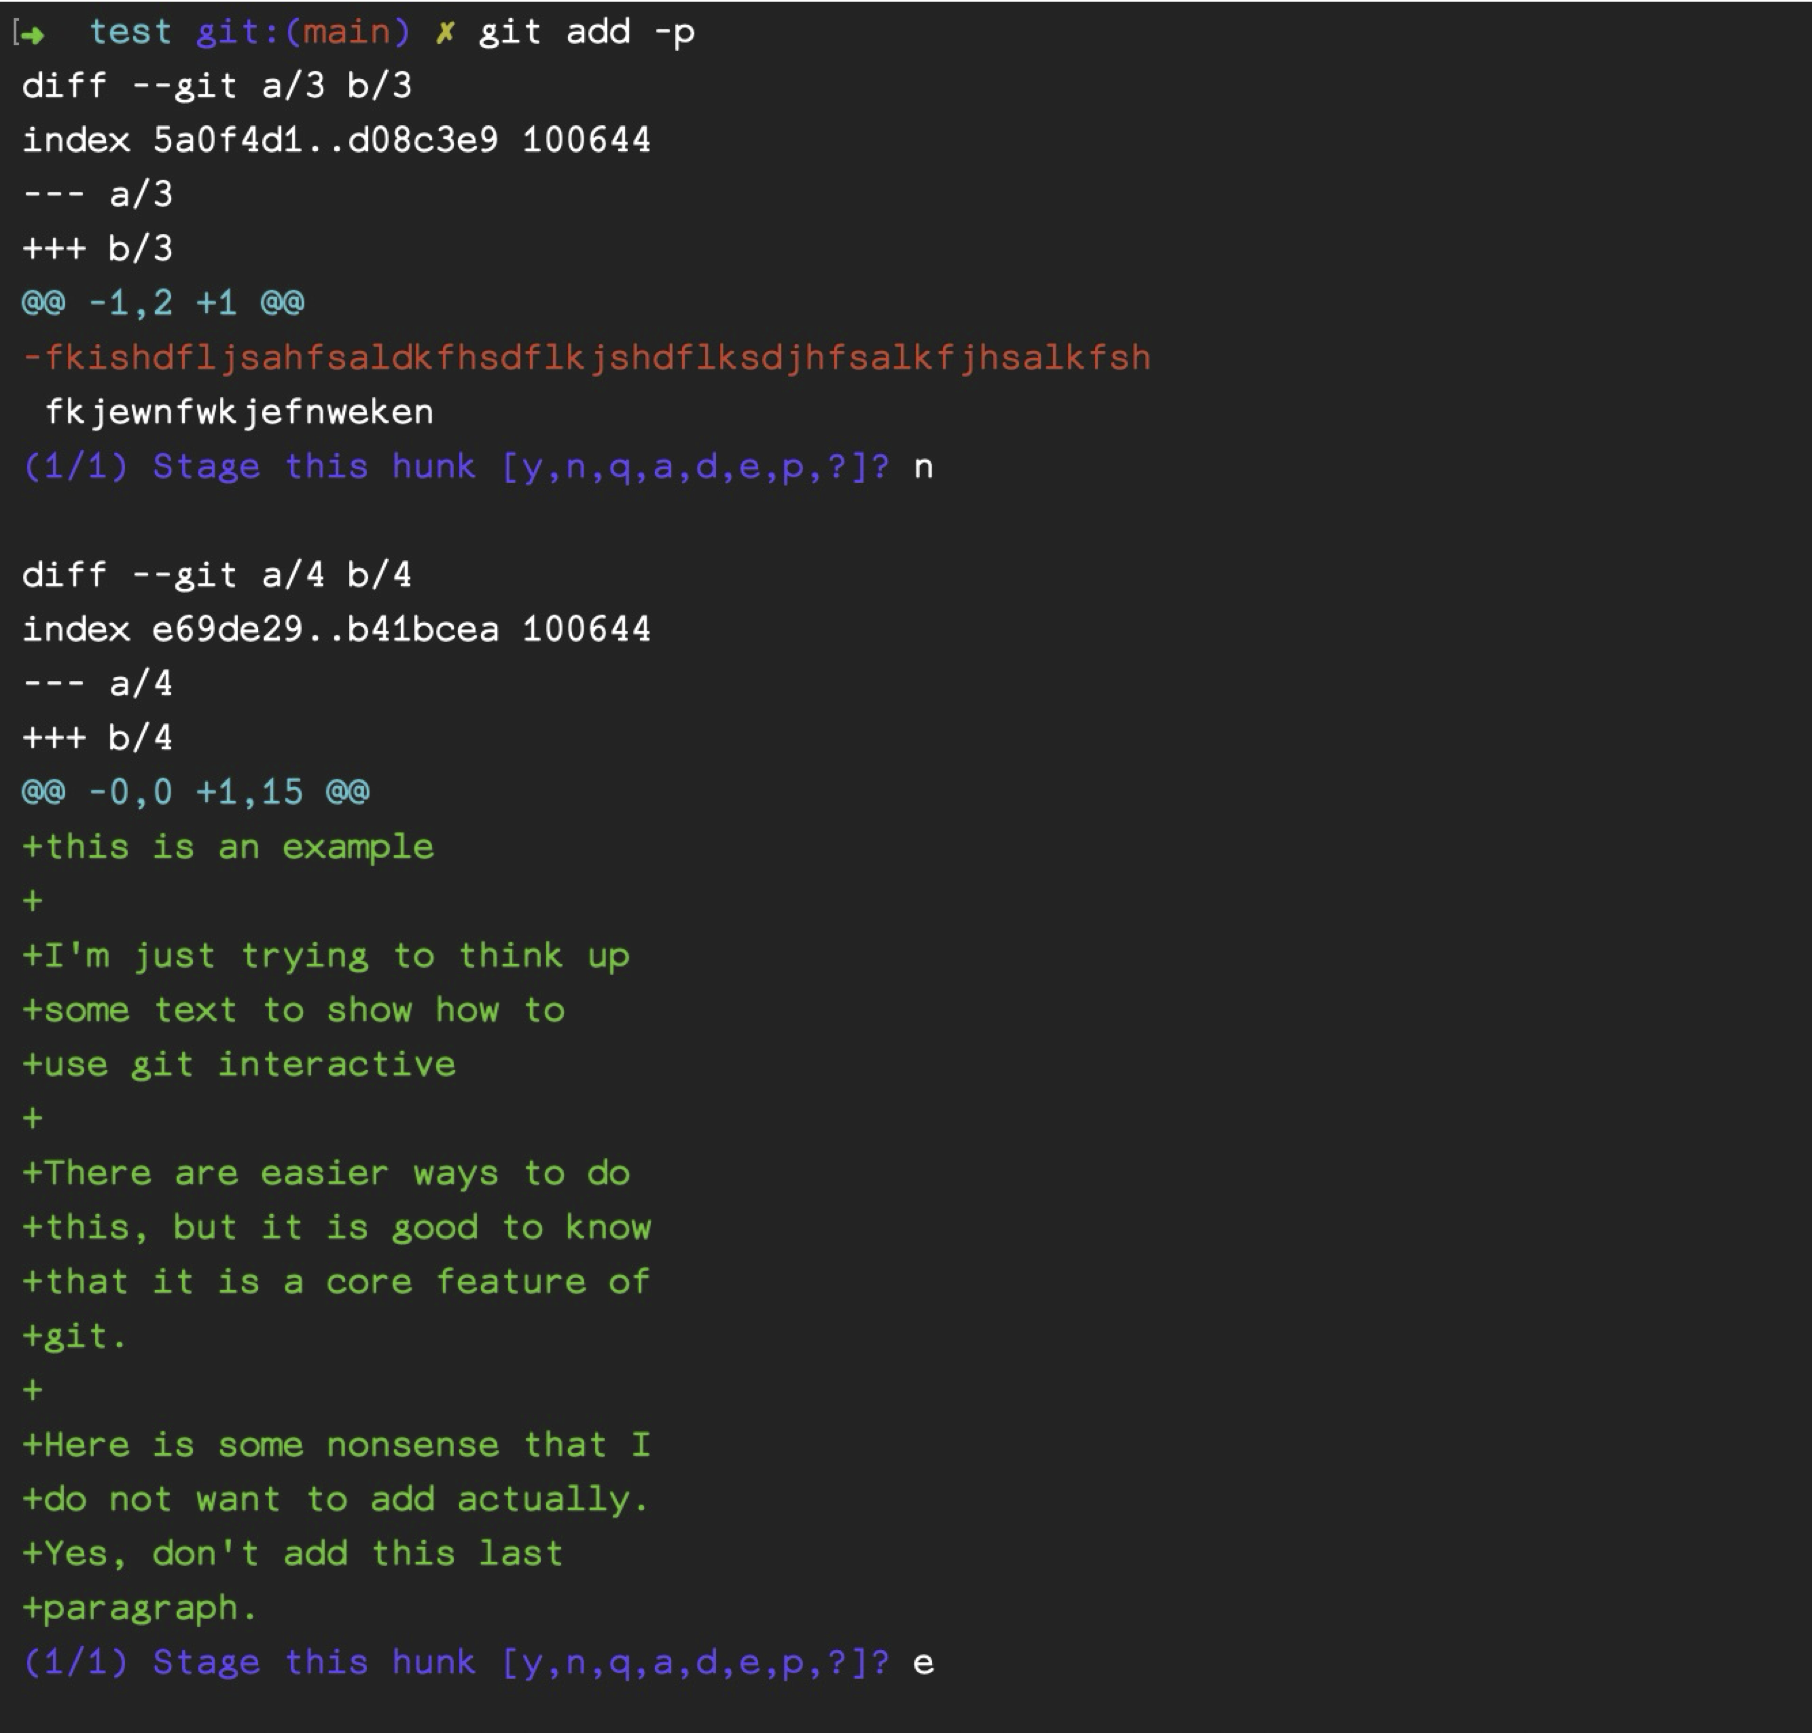
  • git add -p
    • Opens git interactive interface
    • You can add parts of files rather than the whole
    • See course cheatsheet for command overview
    • Quite complex:
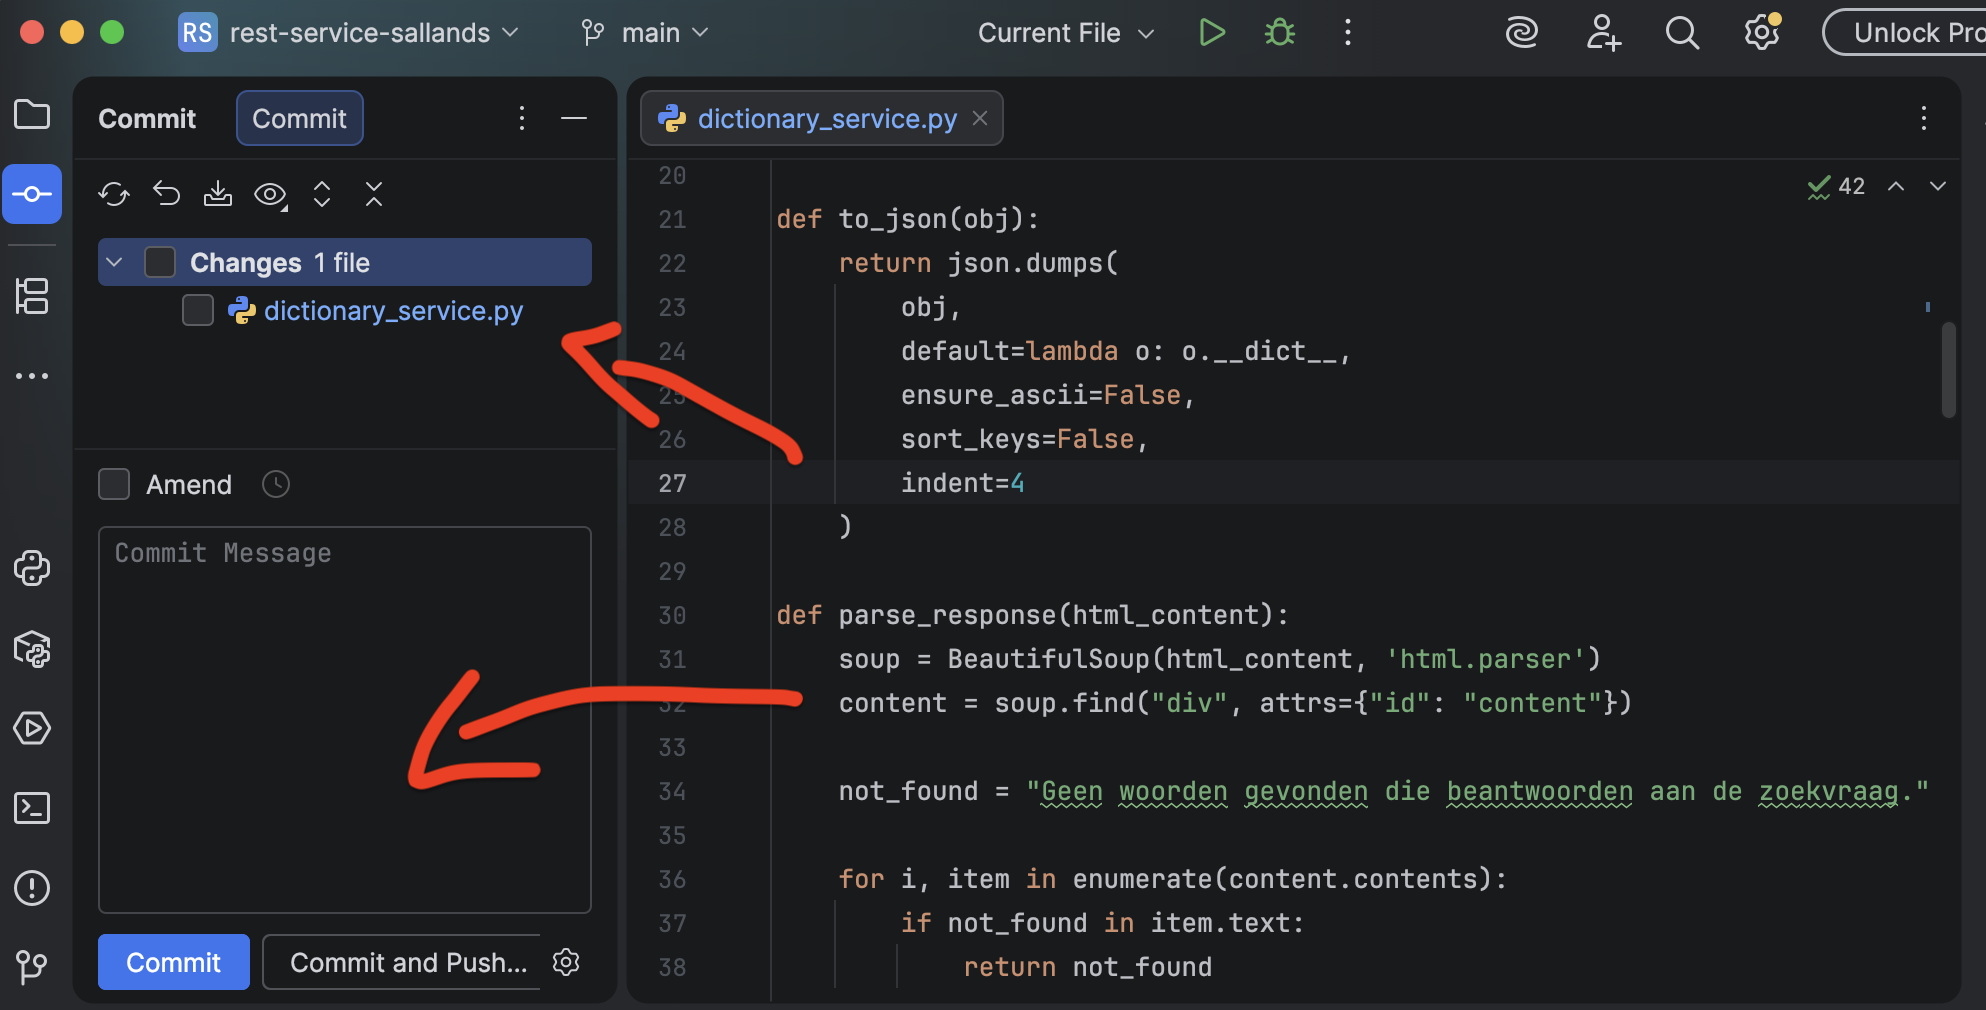
      • Git integration in IDE is easier!
      • TODO link aanmaken

Exercise 6: bringing it together

  1. Pick a topic you are passionate about
  2. Create a new folder under your ‘code’ folder
  3. Create new git repository there with a README:
    1. The README should give brief information on the intent and contents of the repo
  4. Create an initial commit
  5. Create three-ish sub-topic files in which you (very) briefly say something about your topic:
    1. When you add information to a file, make sure that the commit is separate from changes in the other sub-topics
    2. Do update the README when required

Evaluation

  • Please fill out the course evaluation
  • Takes ± 2 minutes!

Extras

The mighty IDE

  • Integrated Development Environment (IDE):
    • Supports a software developer during … software development
    • Combines multiple features into a single environment:
      • An editor
      • A compiler
      • Documentation on relevant programming language(s)
      • A debugger
      • Etc.
      • Etc.
      • And…VERSION CONTROL!
    • There are IDEs for all programming languages

The mighty IDE: PyCharm

The mighty IDE: RStudio
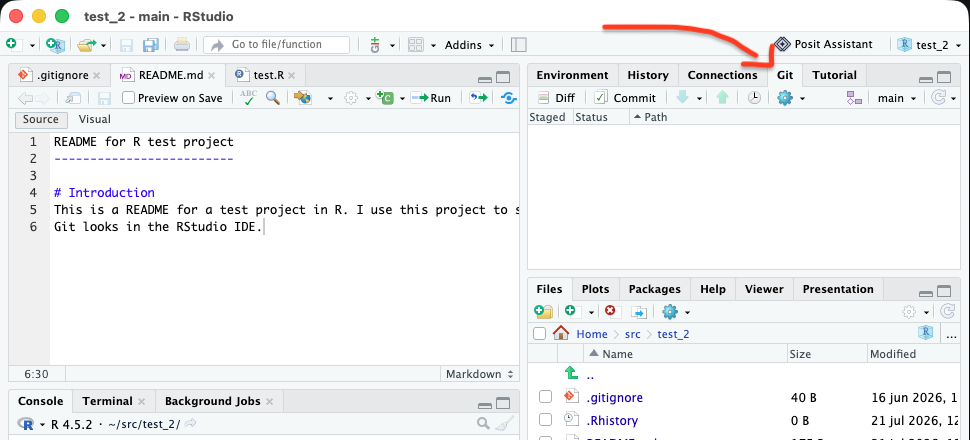
WHY?? Why did you make use the CLI for Git?? T_T

Extra: Git aliases

  • Tired of typing out status and commit?
  • You can configure aliases/shortcuts
    • Allows you to use git st instead of git status for example
git config --global alias.sw switch
git config --global alias.co checkout
git config --global alias.br branch
git config --global alias.ci commit
git config --global alias.st status
git config --global alias.last 'log -1 HEAD'

You got Wise!